-
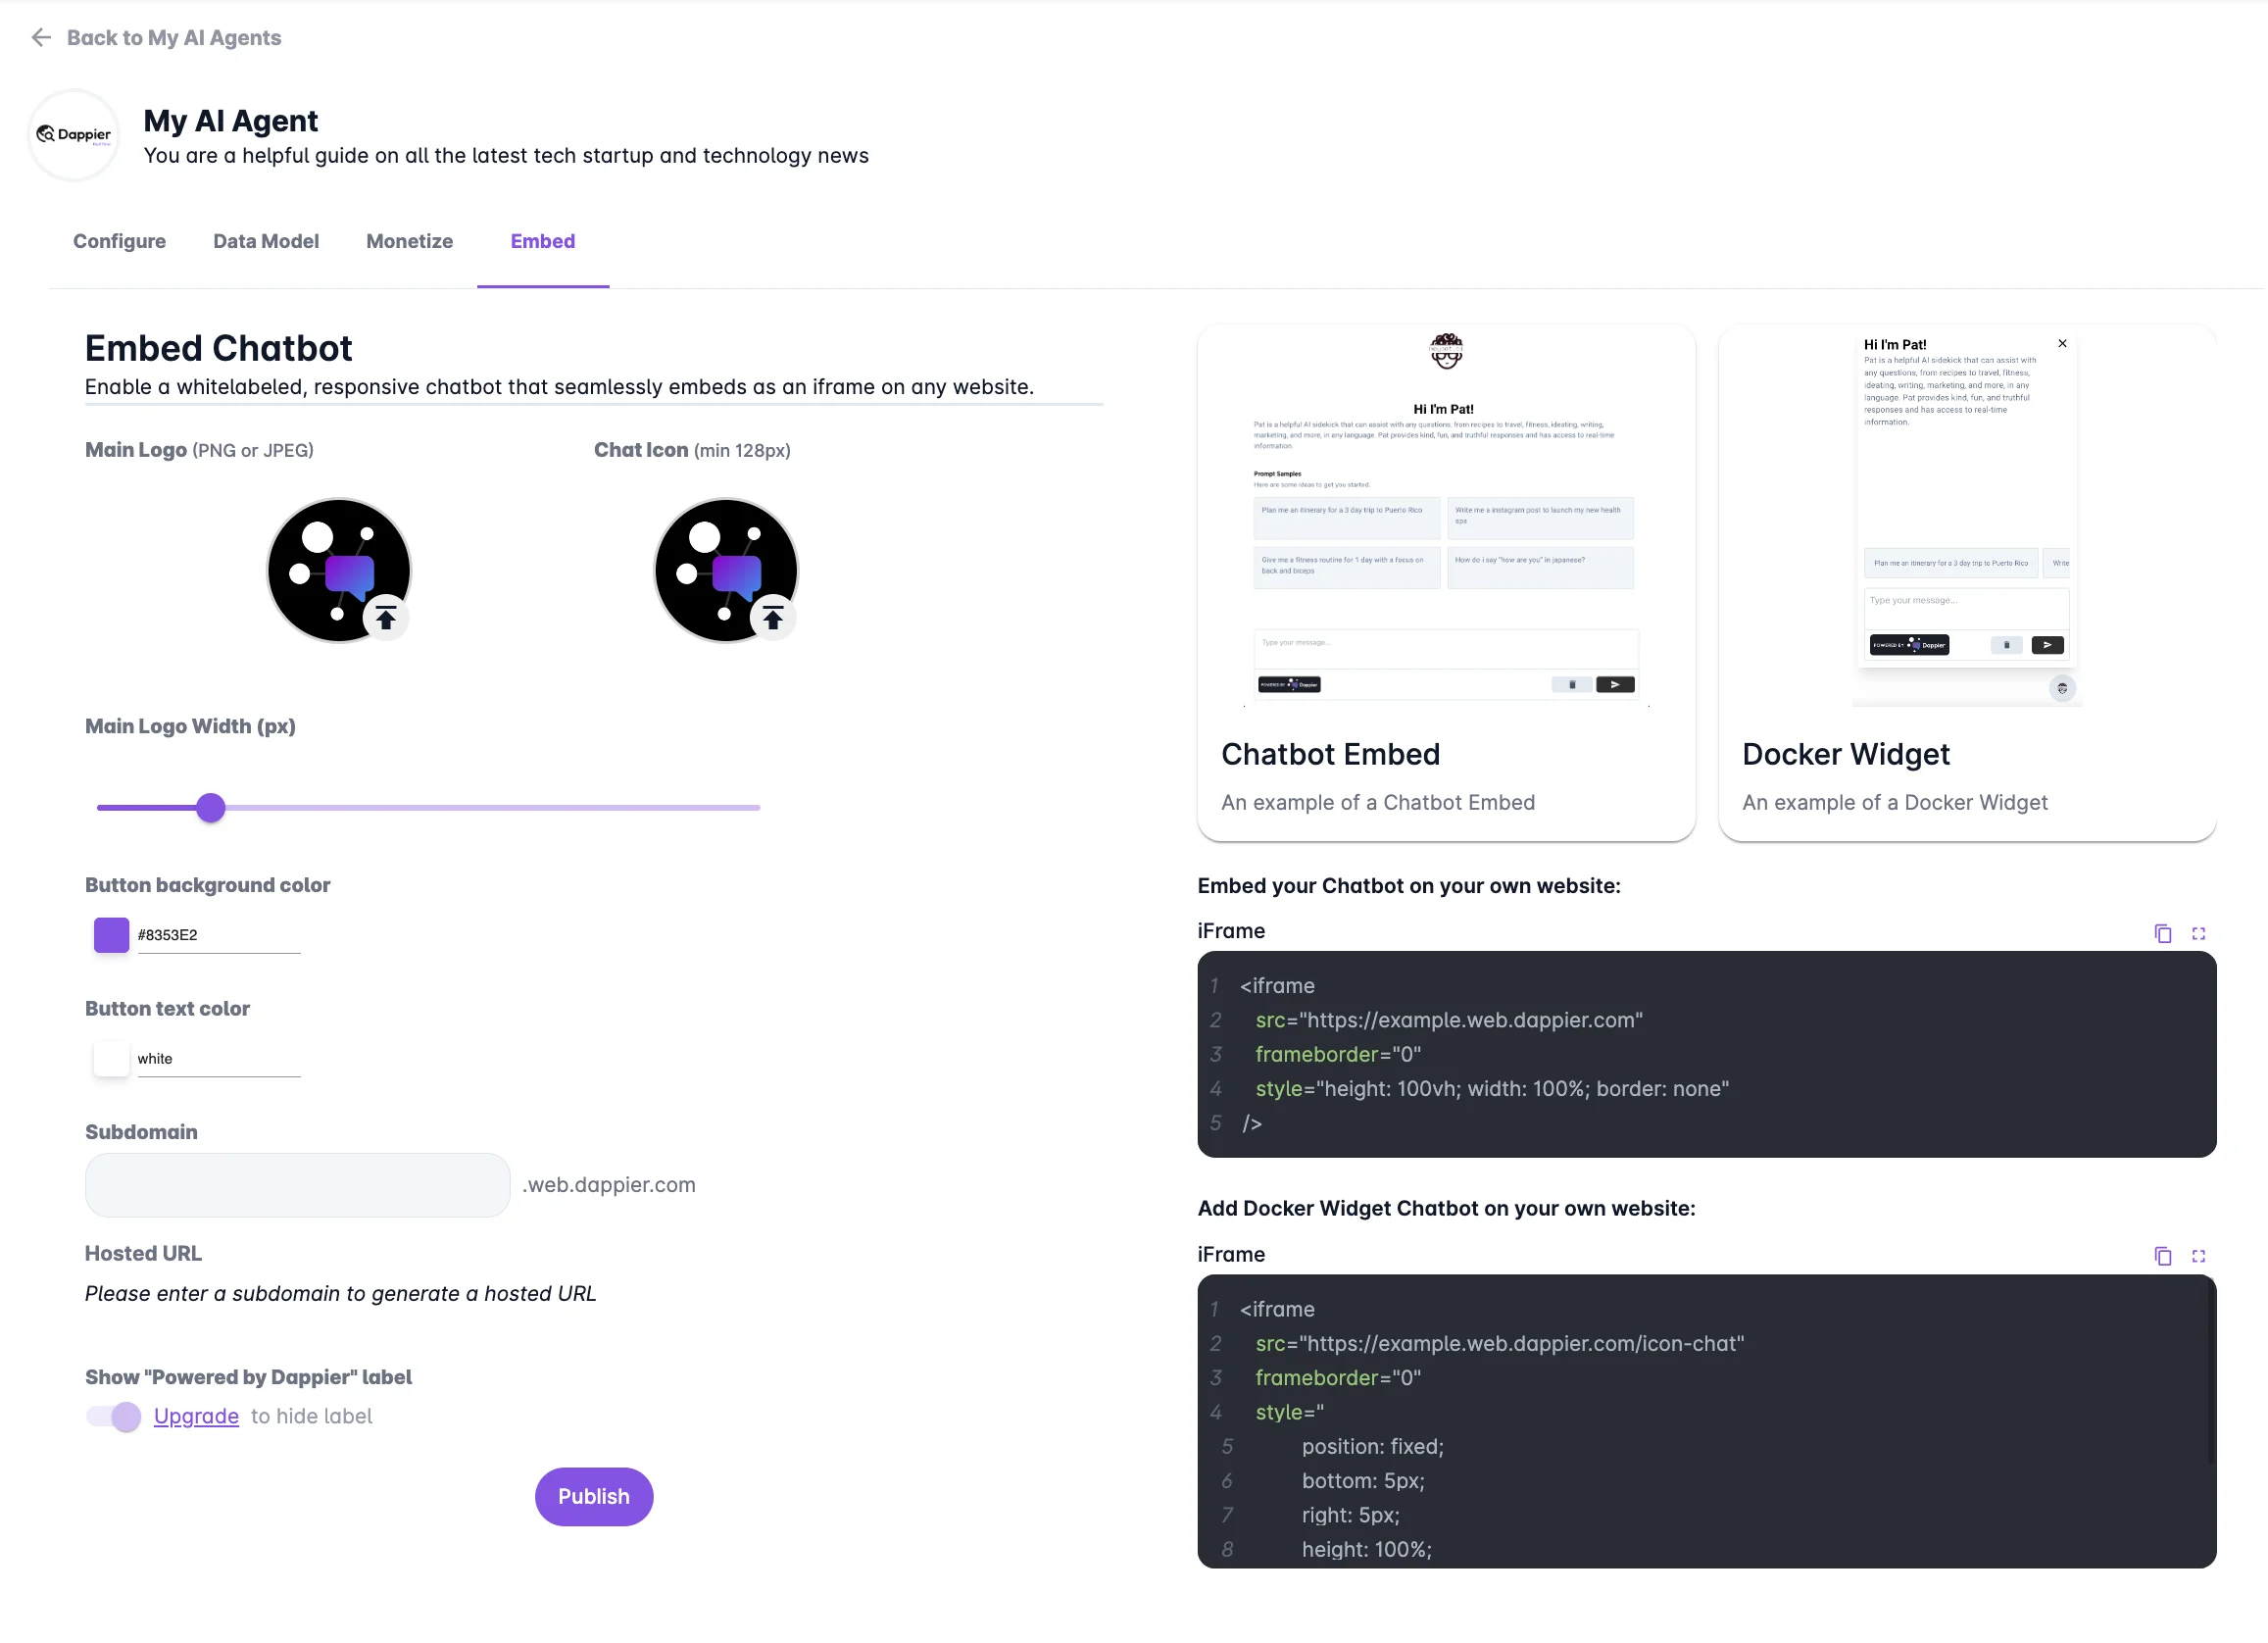
Upload a Logo:
- Select and upload an image file (PNG or JPG) to represent your chatbot. This logo will help brand your chatbot and make it recognizable to users.
-
Upload a Chat Icon:
- Choose an image (PNG or JPG) with a minimum size of 128px to serve as the chat icon. This icon will appear when your chatbot responds to users, adding a visual cue to the interaction.
-
Choose Button Background and Text Colors:
- Customize the appearance of your chatbot’s buttons by selecting background and text colors. This allows you to match the chatbot’s design with your brand’s color scheme for a cohesive look.
-
Disable the Dappier Logo*:
- If you prefer a completely white-labeled chatbot, you have the option to disable the Dappier logo.
-
Preview Your Chatbot:
- After making your customizations, visit the Hosted URL provided in your AI Agent’s settings to preview your chatbot. This allows you to see how the chatbot will appear and function on your website before finalizing the changes.